Hangar 9 25% (1.20 size) Cap 232 ARF
My first 25% plane was the Hangar 9 Cap. 
I bought it from Chief Aircraft with a Saito 1.80 as a package deal, $579.


25%Cap Main Page     25%Cap Wing Repair      25% Cap #2


History


Projects/Reviews

Carl Goldberg Falcon 56 MkII

Colombo Andersson 38% Extra


Hangar 9 33% Cap 232


Hangar 9 1.20 Cap 232 (Bob's)


Hangar 9 1.20 Cap 232 (Bill's)

 
Lanier 31.5% Staudacher S600


Sig Kadet Mk II


Sterling Ringmaster


Thunder Tiger Fun Tiger


Updated!!
Pics of Cool Stuff


Crash Pictures


Car Stuff

Updated!!
1989 Jaguar XJS


Updated!!

Random Thoughts
 

Links

Stuff for Sale


Contact
Bob


Bill


Year Built:

2001

Weight:

13.5 lbs (Yikes - too heavy for a 25% IMAC plane!)

CG:

Per manual

Engine:

Saito 1.80

Prop:

APC 18x6

Muffler:

Slimline Pitts

Fuel:

Cool Power 30% Heli

Radio:

Futaba 9zAPWCII
Futaba R127DFM

Servos:

Hitec 5625 MG Ditigal on all control surfaces (dual elevator servos)
Hitec HS81 on throttle

Battery

Futaba 1500 mAh NiCd

Color Scheme:

Stock red Ultracote, I added white Monokote scallops.

Initial Impressions:

*Construction and covering are Average, in my opinion.  The red UltraCote doesn't match everywhere, and doesn't stick particularly well around the edges, even when re-ironed.  (It's funny how much Ultracote quality seem to vary across different ARFs...)
*Included hardware is fine, except for the 2/56 pull-pull for the rudder.  I swapped this out for a 4/40 coated cable setup.
*Servo mounts in wings not glued in very well, needed to be re-CA'd.
*Cowl and wheel pants are nice gel-coated fiberglass.  I found this unusual, typically they are painted.
*Slot for vertical fin was not vertical, filled and re-cut.

Flying Impressions:

*This was my first "big" airplane.  It definitely flies "big", more like a real airplane.  You can't toss it around at speed like a 40-size aerobat, 3D notwithstanding.
*Takeoff is very easy, plane rotates quickly, climb out can be near-vertical, plenty of power.
*The plane seems fast to me, it covers a lot of sky at 3/4 throttle.
*It will snap to the right if you over-elevator it.  I laterally balanced it, which helped some.  It takes very little elevator travel for the basic-type IMAC maneuvers - about 3/4" each way is plenty.
*Landings were/are the trickiest part for me.  Basically, you have to hold a bit of up elevator and a couple of clicks of throttle for downwind, short and final.  This keeps the airspeed under control.  If you set up a long approach and just let the plane sink at idle, it will pick up way too much speed and balloon when you flare.  Too much throttle and it will climb, not enough and it will stall.  Like on a full-scale, try to keep the elevator constant (until the flare) and control your glide slope with the throttle.  This was the biggest change for me in moving up from my .40-.60 size models, which let me get away with fast approaches.
*Having said all that, this is my absolute favorite airplane to fly so far.  It "feels" great, and I love the way it presents in the air.  Trying to make each IMAC maneuver perfect every time is a great challenge.
*I have a grand scheme to shave a pound of weight off this plane when I re-cover it.  I will use CF gear, CF pushrods, lighten up Snoopy a bit, and go nuts with the Dremel.  A pound may be optimistic, we'll have to see...


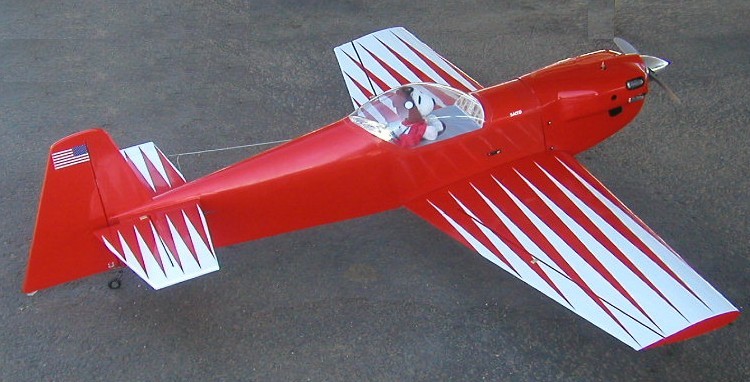
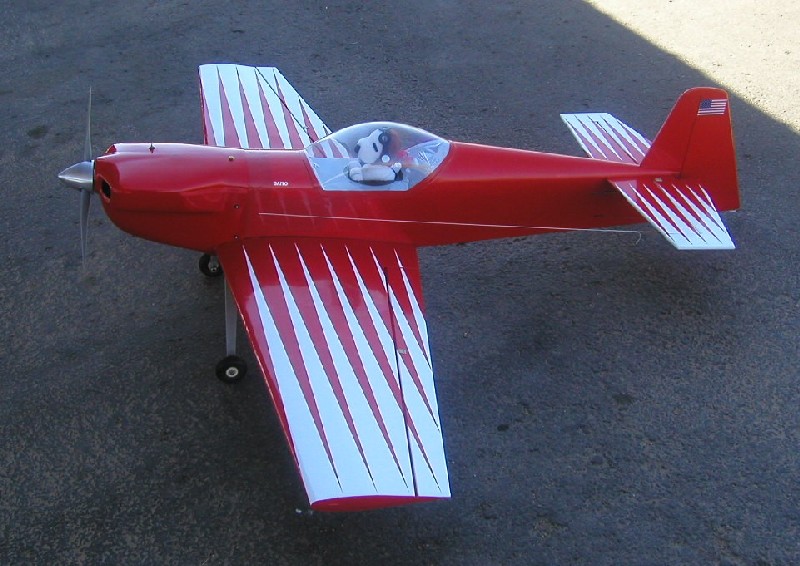
No pics during assembly...Here is the plane after about 80 flights.


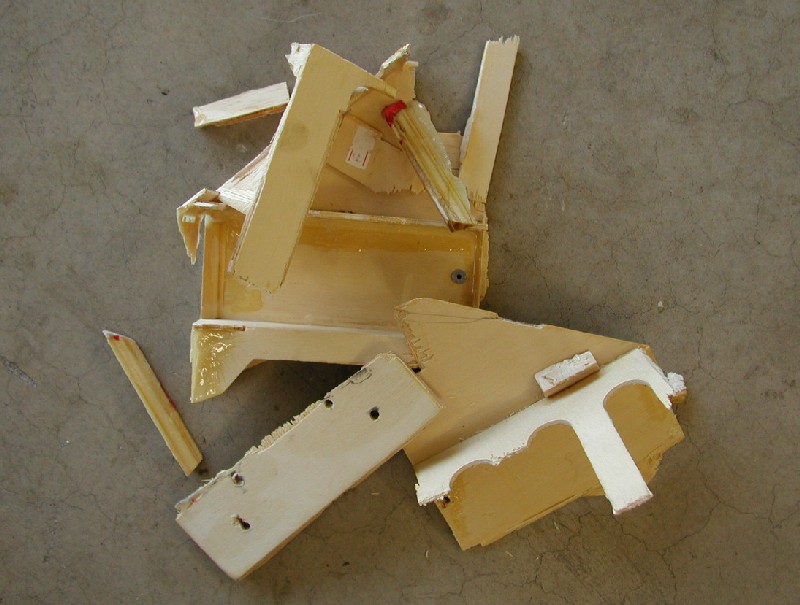
On the 5th flight, I came in too low and caught the gear on a fence at the end of the runway.  Basically, everything in front of F2 was torn off.  I rebuilt from scratch, and likely over-engineered it.  I think I picked up some weight, probably used too much epoxy.  Here is what is left of the original front-end.  I was able to re-use the firewall during the re-build.

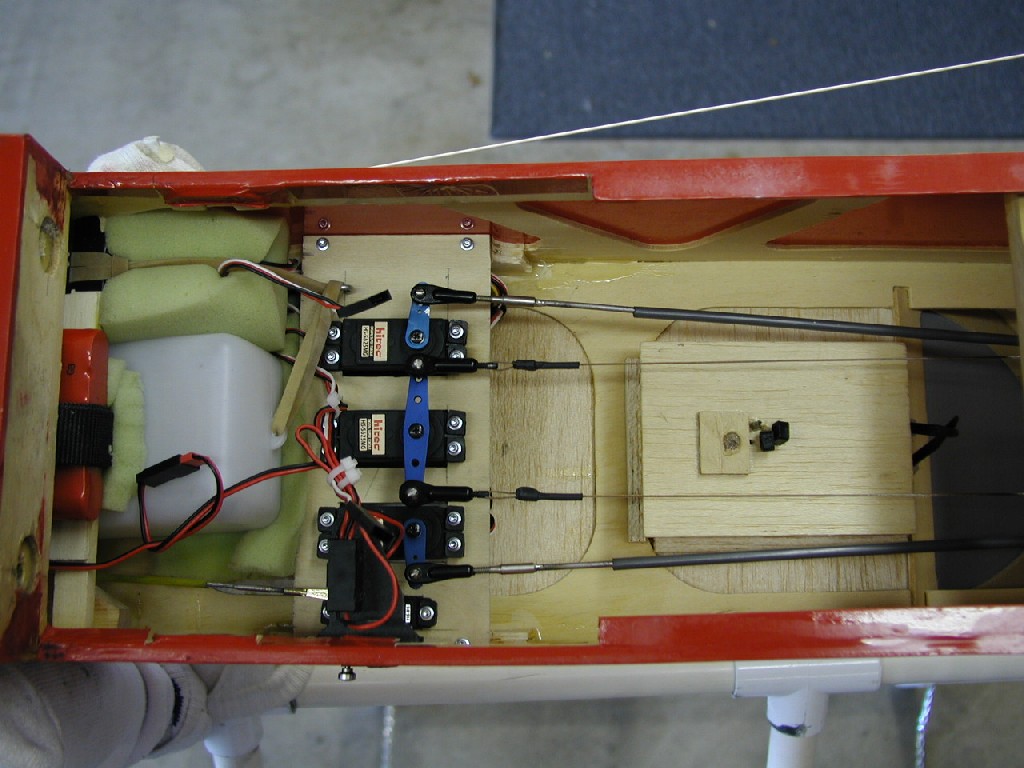
The stock servo rails came loose during the Tucson 2002 Fall IMAC.  I spent 10 minutes at 3/4 throttle and 1/2" up elevator zooming around burning fuel before I was able to land. HUGE thanks to Doug Gearman, who basically "talked me down."  Anyway, here is the new servo tray I built to replace the rails.  Again, probably over-engineered and a bit heavy.
In this pic you can also see that I've moved the tank back to be closer to the CG.  Using HiTec aluminum servo arms and Rocket City ball links on the servo end of things.  You can also see where I widened the wing seat on the bottom of the fuse.